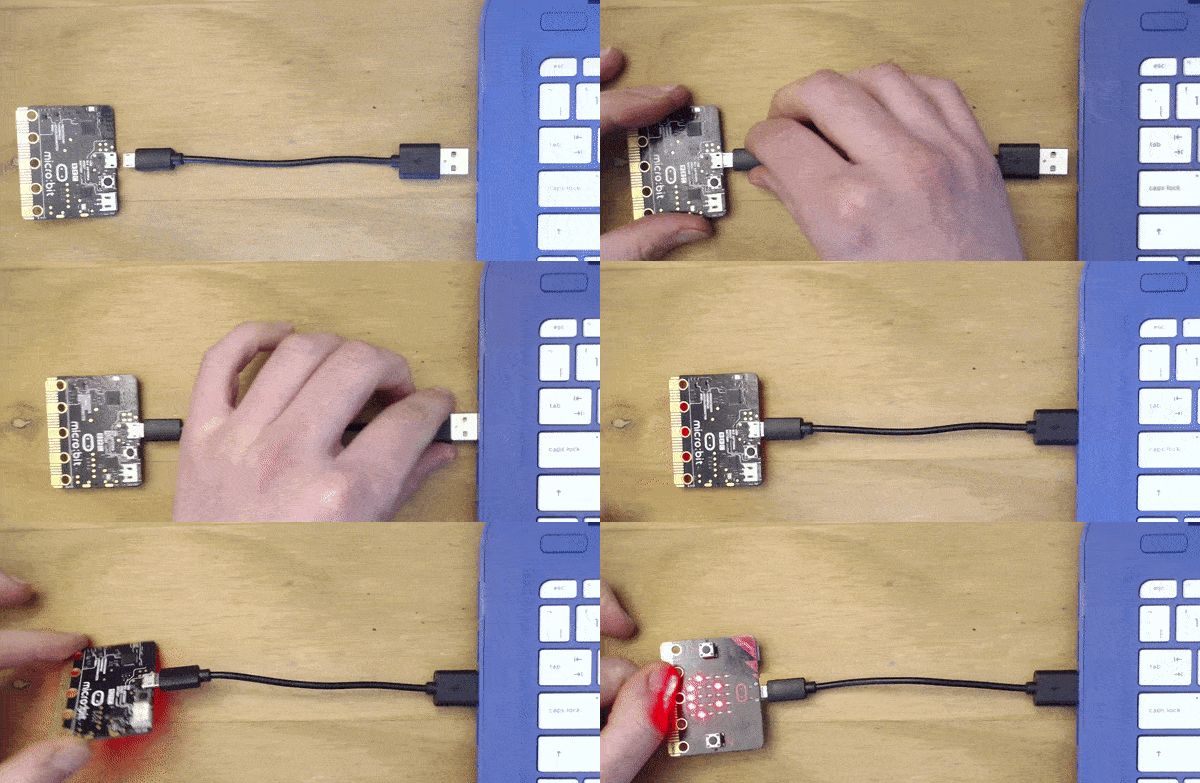
You can follow our simple guide in the Quick Start section of the website. The process of transferring code is called Flashing. Once the micro:bit has been flashed, the code will run automatically.
The micro:bit can only run one program at a time - every time you drag-and-drop a hex file onto the device over USB it will erase the current program and replace it with the new one. If you want to reset your micro:bit to it's 'out of the box' state, flash the original .hex file that came with your device.
To flash the program via the USB connection, you'll need the following things:
- A Micro USB cable to connect your computer to your micro: bit.This is the same cable that is commonly used to connect a smartphone to a computer (make sure that it can transfer data as well as power).
- A Computer running Windows 7 or later, Mac OS X 10.6 or later, Linux or Chrome OS
- Access to the Internet
Step 1: Connect your BBC micro:bit to your computer

- Connect the small end of the USB cable to the micro USB port on your BBC micro:bit
- Connect the other end of the USB cable to a USB port on your computer.
On computers running Windows, MICROBIT appears as a drive under Devices and drives. | On a Mac MICROBIT appears as a new drive under Devices. | On a Chromebook MICROBIT will appear as a new device in file manager | On Linux MICROBIT will be mounted as a drive eg at /media/pi/MICROBIT |
 |  |  |  |
Step 2: Compile your program
Compiling translates code from high level programming languages like Javascript and Python to low level machine code that the micro:bit can interpret. When you download a file from one of the editors, it is compiled in the browser and downloaded as a .HEX file.
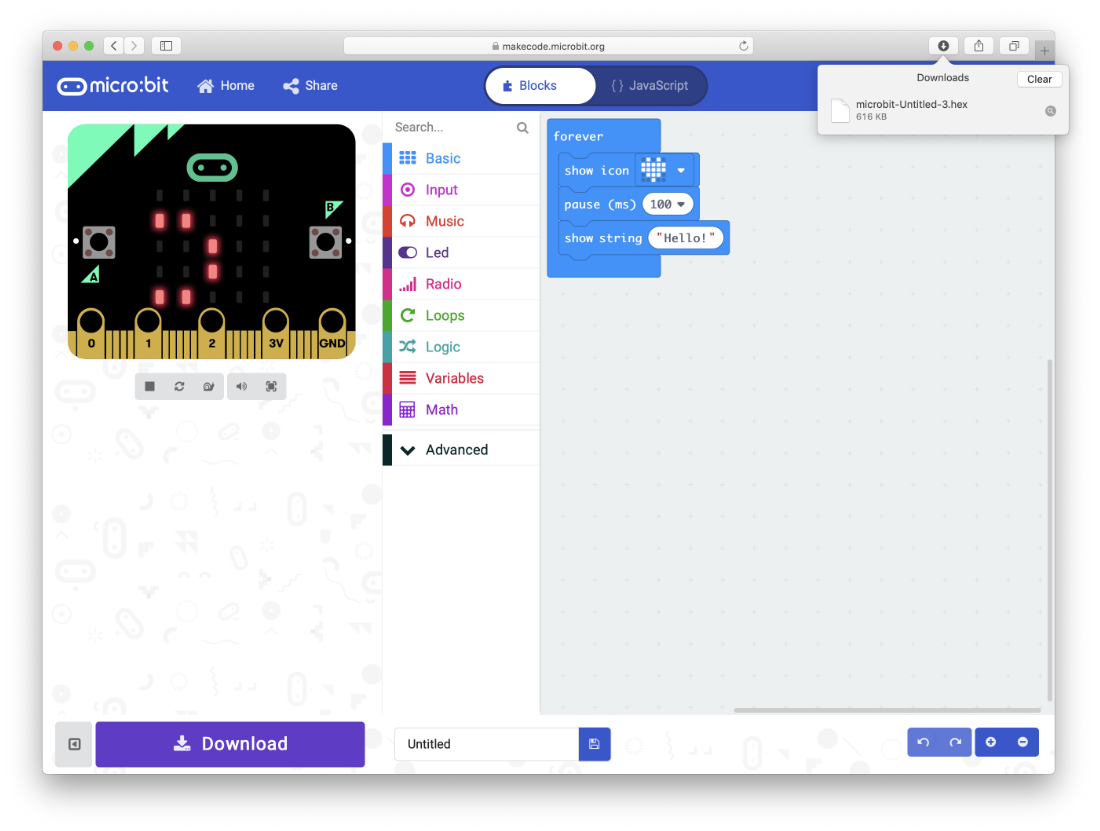
Using the editor of your choice, select download and if prompted, choose to save the compiled file on your computer (or anywhere other than the BBC micro:bit).
Windows Edge
Select Download. When asked what to do with this file, select Save and it will be saved to your Downloads folder. Selecting Open Folder will allow you to view your downloads


Mac Safari
When you select Download in Safari, your file will apppear under downlaods in the top right of the screen, you can open your downloads folder from here.

Chrome
This is the same process on Windows and Mac. Select Download and your .hex file will appear as a download at the bottom of the browser.
Right click on the download and select show in folder.


Step 3: Flash the file to your BBC micro:bit
The process of transferring the .HEX file to the BBC micro:bit is called flashing. To flash the file, simply drag and drop it on to the micro:bit drive from the file explorer or finder window. Here's a video of the process
- The LED on the back of your BBC micro:bit flashes during the transfer (which should only take a few seconds).
- Once transferred, the code will run automatically on your BBC micro:bit. To rerun your program, press the reset button on the back of your BBC micro:bit. The reset button automatically runs the newest file on the BBC micro:bit.
- By copying the program onto the 'MICROBIT' drive, you have programmed it into the flash memory on the micro:bit, which means even after you unplug the micro:bit, your program will still run if the micro:bit is powered by battery.
Troubleshooting
- You can’t drag and drop more than one hex file at once onto your micro:bit. If you try to drag and drop a second hex file onto your micro:bit before the first file has finished downloading, then the second file may fail in different ways.
- When the first program has been written to the micro:bit, the drive will eject. If you drag and drop a second file at this point it may not find the drive and the second write will fail.
The errors may look like this:
Windows | Mac |
 |  |
Or it may appear that there are two hex files on your BBC micro:bit so the micro:bit won’t be able to run multiple files. To rectify this, unplug your micro:bit and plug it in again. Make sure that your micro:bit appears as a MICROBIT drive and not MAINTENANCE.
Further information
Here are instructions for the MakeCode Editor using different browsers on Windows and Mac computers. Choose the one you’re using:
