
Overview
If you are using an Android device with your micro:bit, we recommend using a USB cable between the device and the micro:bit, if possible (you will need an appropriate cable or adapter for this, see details below). The experience is then via your web browser (for example, Chrome) just like on a computer.
If you do not have the necessary adapter/cable, then there is a micro:bit app for Android available to download from the Google Play Store. In the app, you can write code in MakeCode and send it to your mobile device over Bluetooth.
Please note: If you installed the app before 18 April 2024, please update to the latest version, to access the improvements made in the app.
If you would like to use micro:bit CreateAI, there is a micro:bit CreateAI app for Android tablets available to download from the Google Play Store. Learn more in the micro:bit CreateAI user guide.
Contents
Using a USB cable with an Android device
Sending a program to the micro:bit
Viewing data logging files (MY_DATA.htm)
Troubleshooting
Using a USB cable with an Android device
The simplest way to work with the micro:bit on an Android device is by using a cable and running the code editor (Microsoft MakeCode or the micro:bit Python Editor) through your web browser as you would on a computer. To do this, you can either:
- Use the micro:bit USB cable provided plus a USB-A to USB-C adapter so that the cable fits into the USB-C socket on your Android device. These adapters are commonly available at a low cost (see what type of USB lead do I need? for more details).
- Or get a USB-C to micro USB cable to go directly from the micro:bit to your Android device. These can also be purchased at a low cost from many retailers.
Note: MakeCode in a browser is designed for phone and tablet use, the micro:bit Python Editor is only designed for tablet use.

Example of an adapter with (plug) USB-C on one end and (socket) USB-A on the other

Example of a micro USB (top left) to USB-C (bottom right) cable
Sending a program to the micro:bit
Sending a program from MakeCode or the micro:bit Python Editor using a cable
- Plug in your cable and open https://makecode.microbit.org#editor in a Chrome or Edge browser.
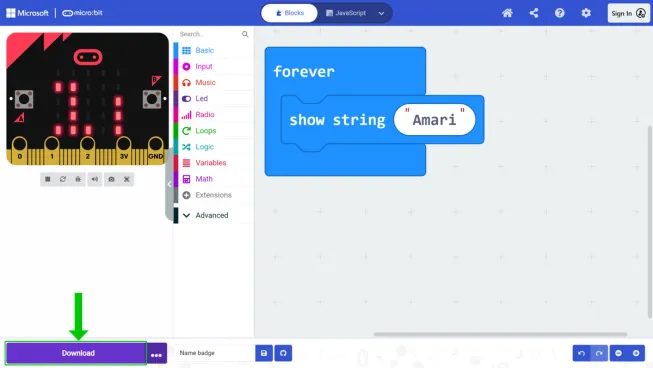
- Click on the Download button and select Pair.
- A browser pop-up will let you select your BBC micro:bit and then click Connect.
- Then select Download and the code will transfer to your micro:bit. You may get an additional notification asking if you want to allow your Android device to communicate with the micro:bit.
- The first time you do this it may take a bit longer, but subsequent transfers will be faster.
Sending a hex file using a cable
This is the right approach if you have a micro:bit program as a hex file that either cannot be opened in MakeCode or the micro:bit Python Editor. For example, to put the Meet the micro:bit program onto your micro:bit.
First, download the code from the web. A message will appear at the top of the screen letting you know it has been downloaded.
Second, use your cable to connect the micro:bit to your phone.
After, there are two ways to transfer the downloaded hex file to the micro:bit.
Sending a hex file using our online micro:bit WebUSB hex file flashing tool
- Visit https://microbit.org/tools/webusb-hex-flashing/ on your phone’s browser.
- Click on the 'Drag and drop a hex file…' zone. Allow permissions if asked, click on the 'Files' option, and select the hex file you would like to send.
- Once a file is selected, click 'Send to micro:bit' button to send the program to the micro:bit.

- Click the 'BBC micro:bit…' option and click 'Connect' on the dialog.

Wait for the file to get transferred to the micro:bit until you see "Flash complete".

Manually transferring the hex file to the micro:bit directory
Unfortunately this method may not work for older versions of Android and for micro:bit V2 only.
- Open 'My Files' app on the Android device.

- Navigate to the 'Downloads' folder in the 'My Files' app.

- Find the file you downloaded from the web and long press on it. You should see a checkbox appear on the left of the file and a menu appear at the bottom of the screen.

- Select the 'Move' option on the bottom menu. This will reveal new menu options at the bottom of the screen.

- Go back to the main page and navigate to the USB storage menu option (e.g. 'USB Storage 1' in the example below) by selecting it.

- Select 'Move here' to move the downloaded file into the folder. You should see the file added to the folder.

- Wait for the file to get transferred to the micro:bit. The LEDs on the micro:bit should clear up and a yellow light on the back of the micro:bit should start flashing until the file transfer is complete.
Sending a MakeCode program using the app
When you are ready to try your program on your micro:bit select 'Download' in the MakeCode editor and follow the instructions to transfer your code to your micro:bit.
This video takes you through the process in detail:
Each time you send code to your micro:bit on an Android device you will need to first enter Bluetooth mode (except in some advanced projects where Bluetooth mode has been permanently enabled in the project).
As described in the video, to enter Bluetooth mode you press the reset button 3 times quickly (or if that does not work, the alternative method is to simultaneously hold the A and B buttons, then keeping these held, press and release the reset button).
Viewing data logging files (MY_DATA.htm)
If you have completed a data logging activity on the micro:bit, you can use a cable or the Android app to view the data stored on the micro:bit. This data is stored in a file called MY_DATA.htm.
Viewing data logging files (MY_DATA.htm) using a cable
- You will need a browser app, such as the Chrome web browser, installed on your Android device.
- Plug in your cable and open your 'My Files' app on the Android device.

- Select the USB storage menu option (e.g. 'USB Storage 1' in the example below).

- Select the 'MY_DATA.HTM' file to open it.

- 'Open with' options will appear. Find and select the browser app (e.g. 'Chrome') to open 'MY_DATA.HTM' using the browser app.

Viewing data logging files (MY_DATA.htm) using the app
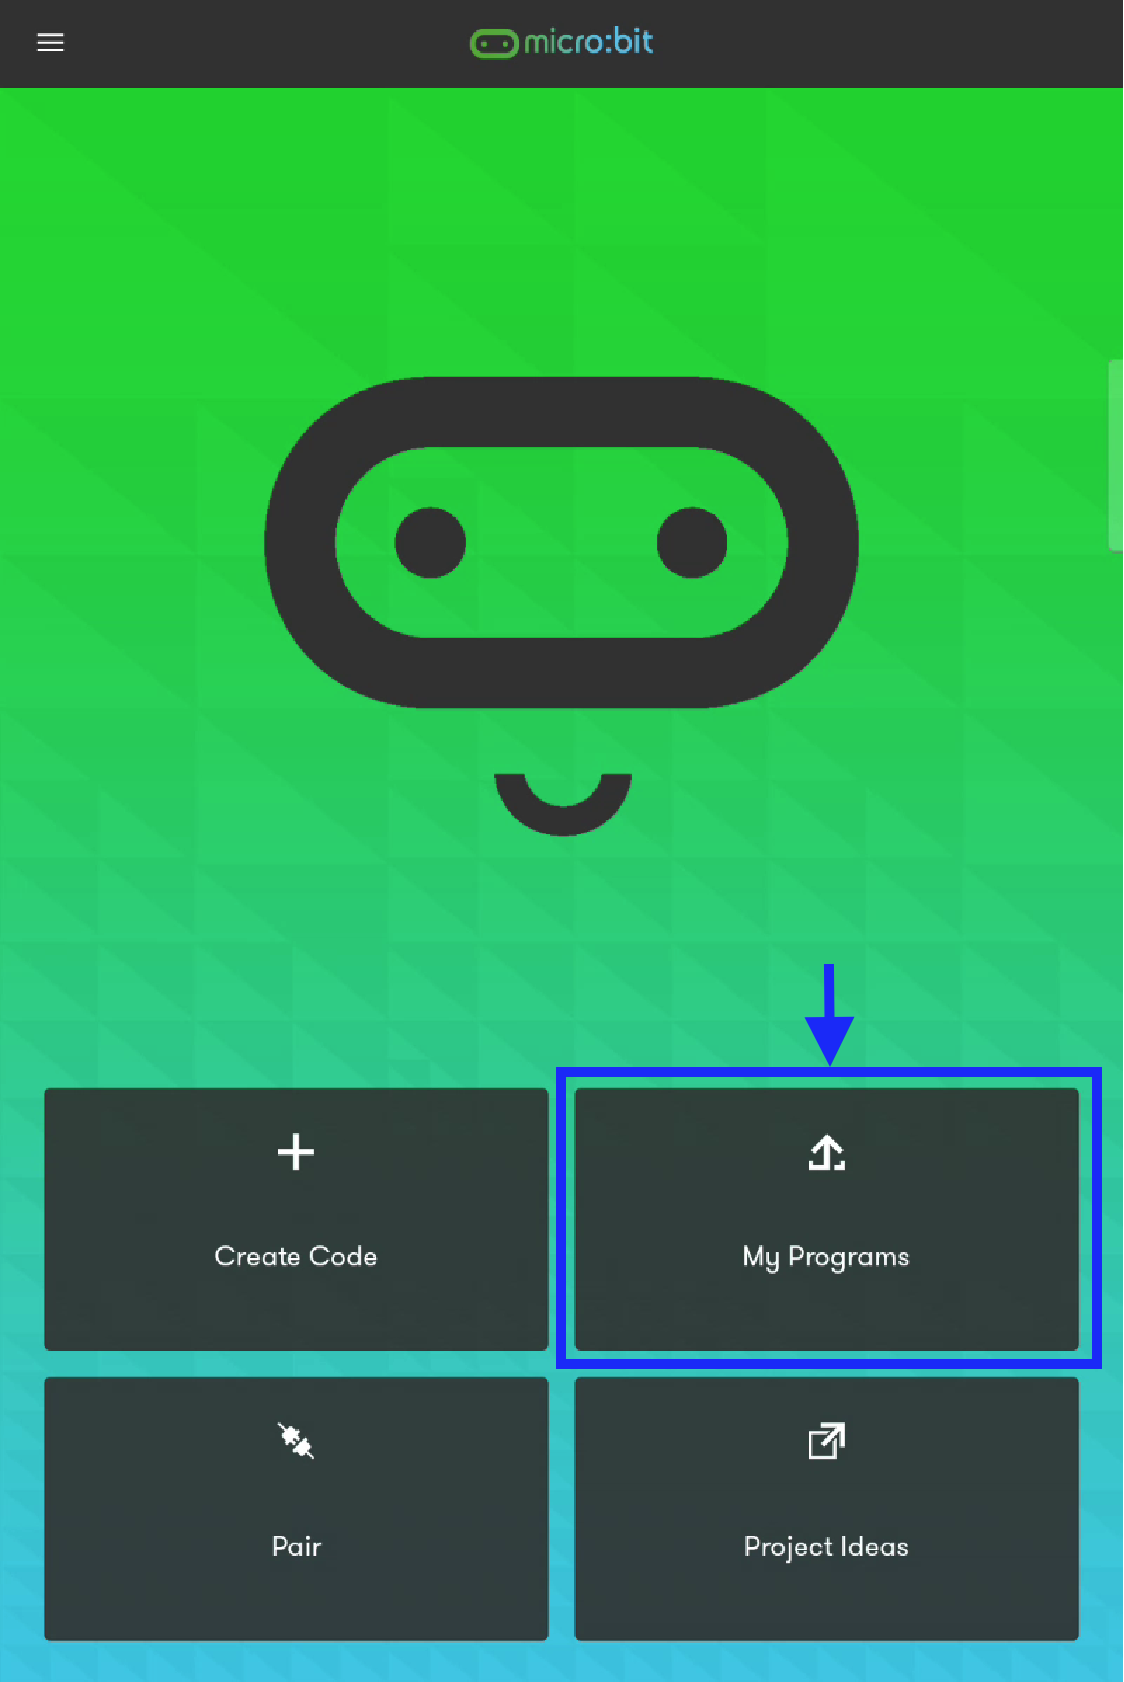
- From the micro:bit Android app home screen, select ‘My Programs’.
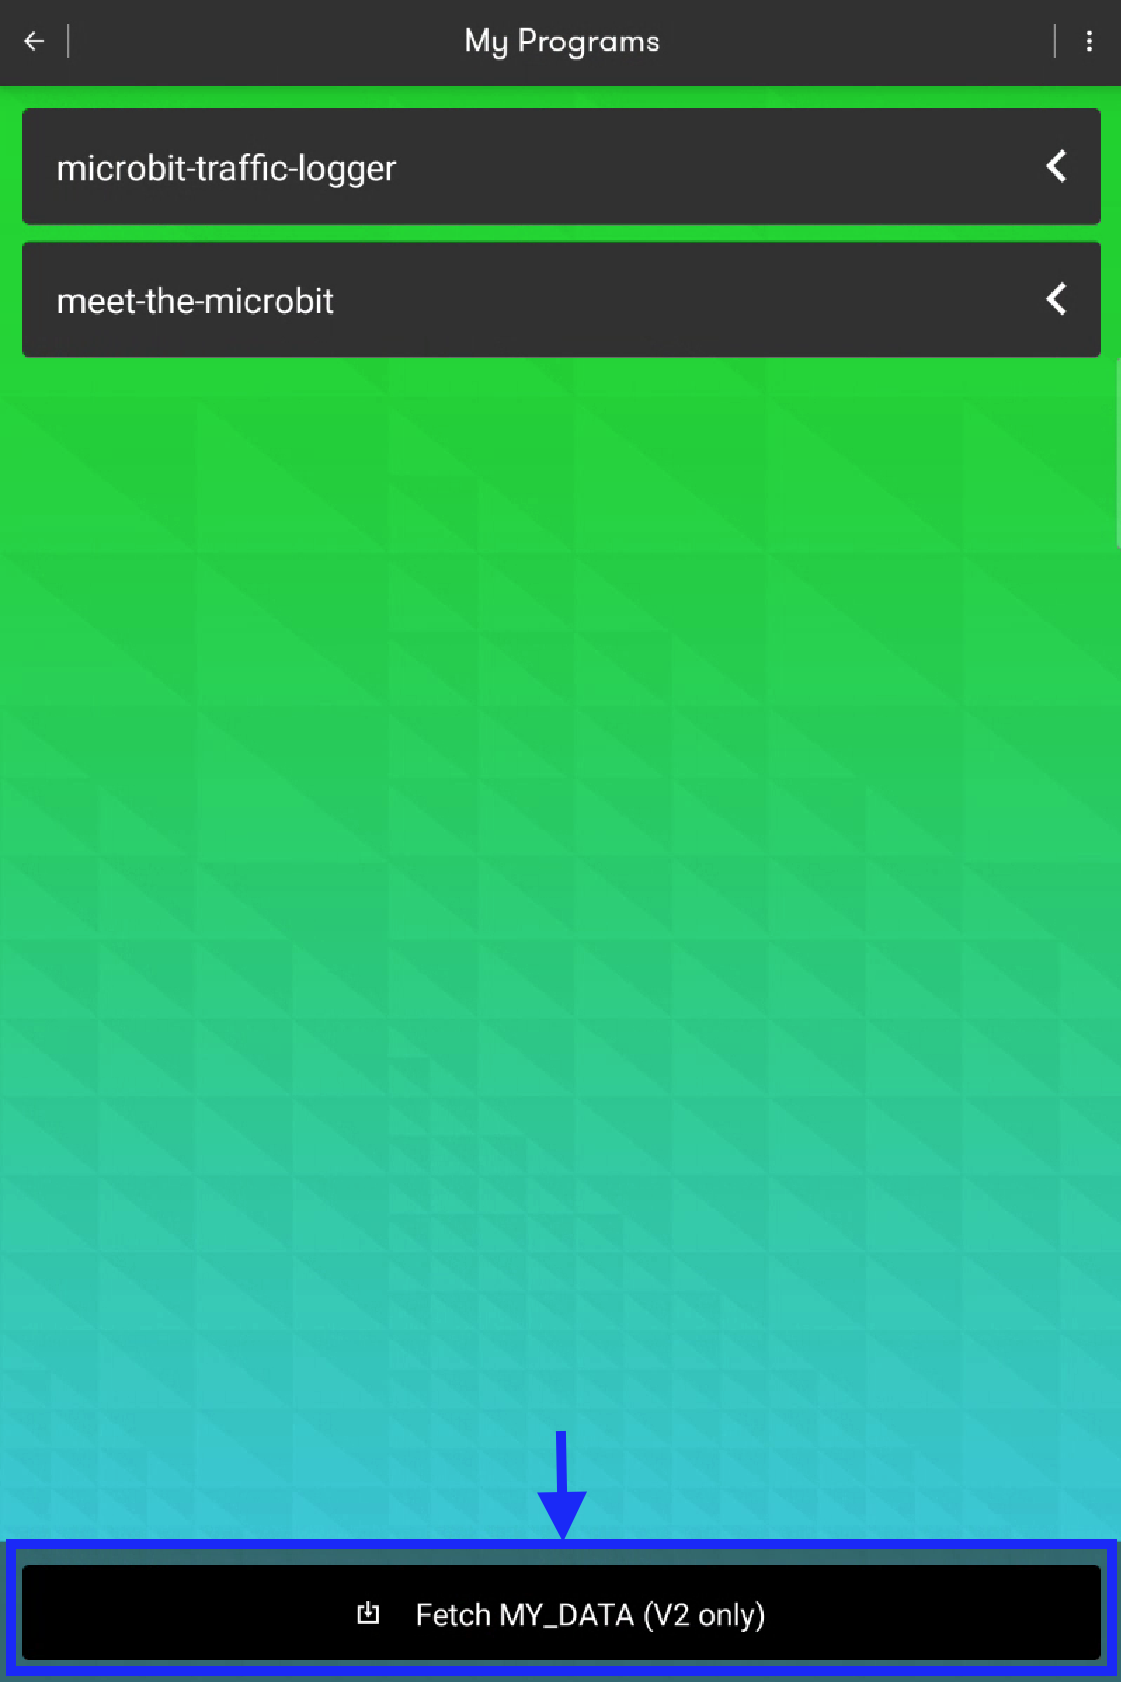
- In My Programs, select ‘Fetch MY_DATA (V2 only)’.
- On the micro:bit, enter Bluetooth mode by pressing the Reset button 3 times: all LEDs will turn on, then you will see a Bluetooth icon briefly, before the micro:bit's ID is shown as a pattern of LEDs.
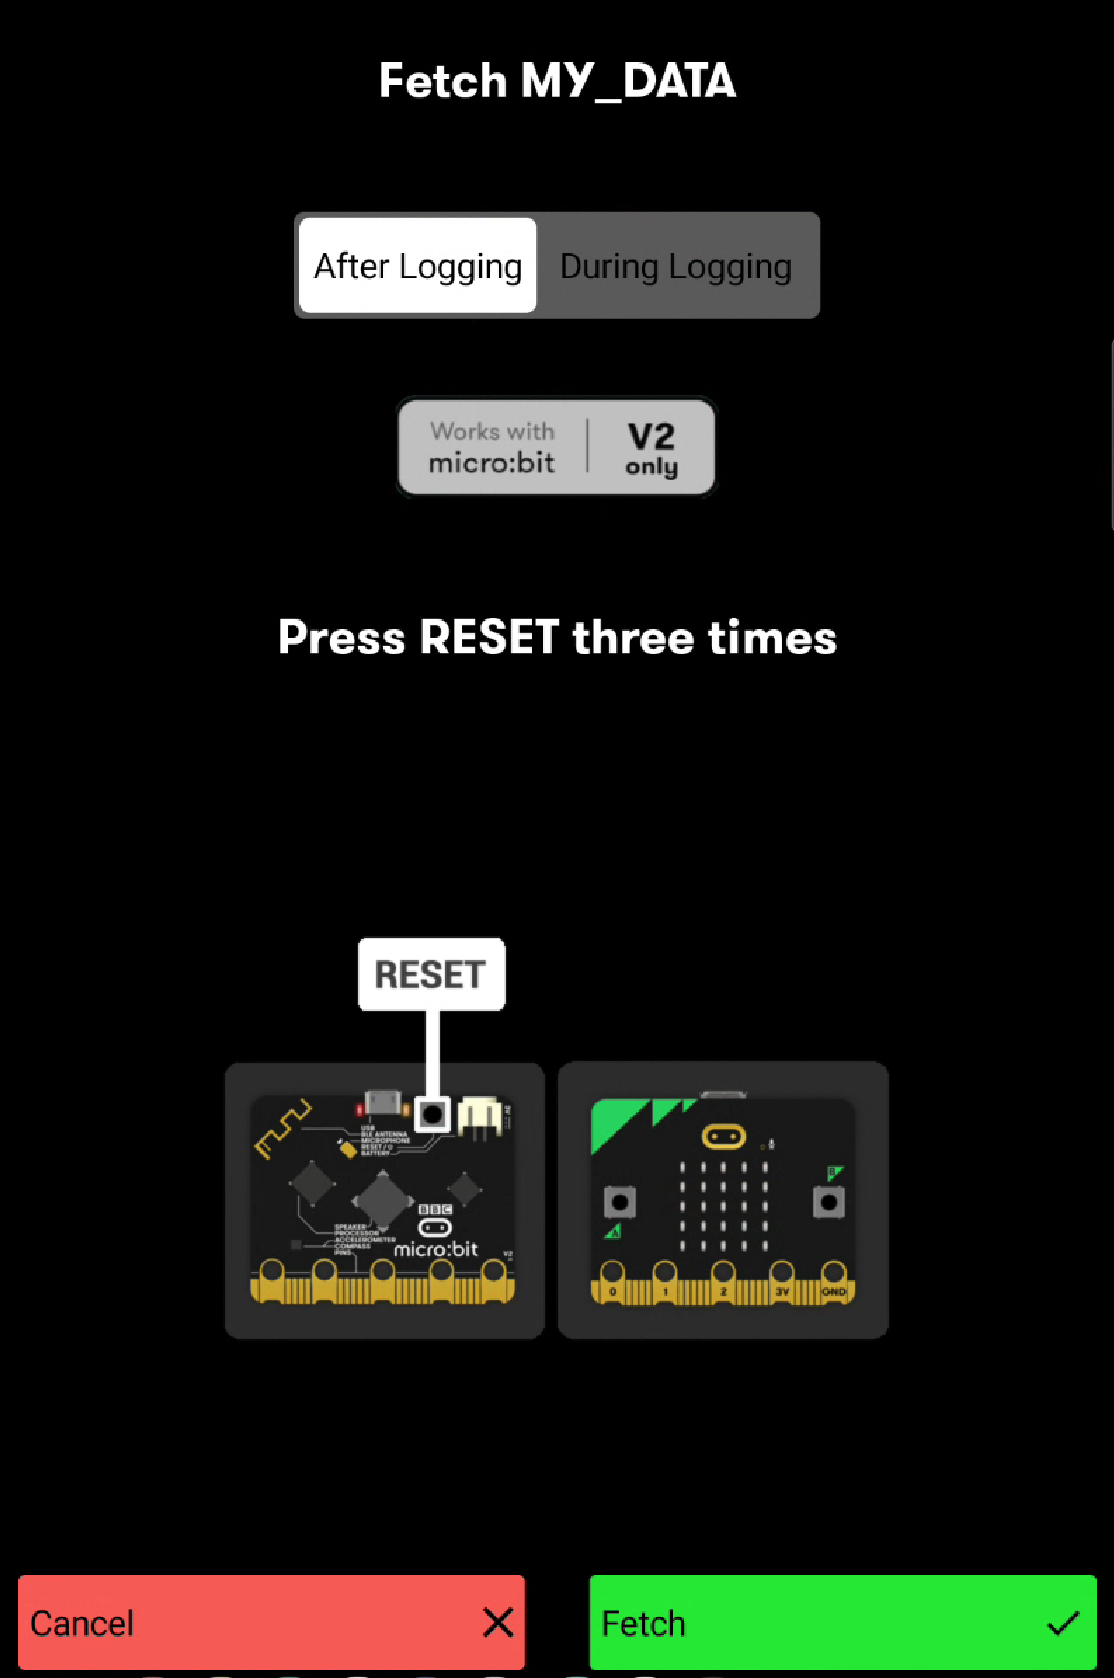
- Once ready, choose ‘Fetch’. The app will start searching for the micro:bit. If you have already paired the micro:bit, the app will shortly start fetching MY_DATA.htm. If the micro:bit has not been paired with the app, follow the steps on-screen to complete pairing.
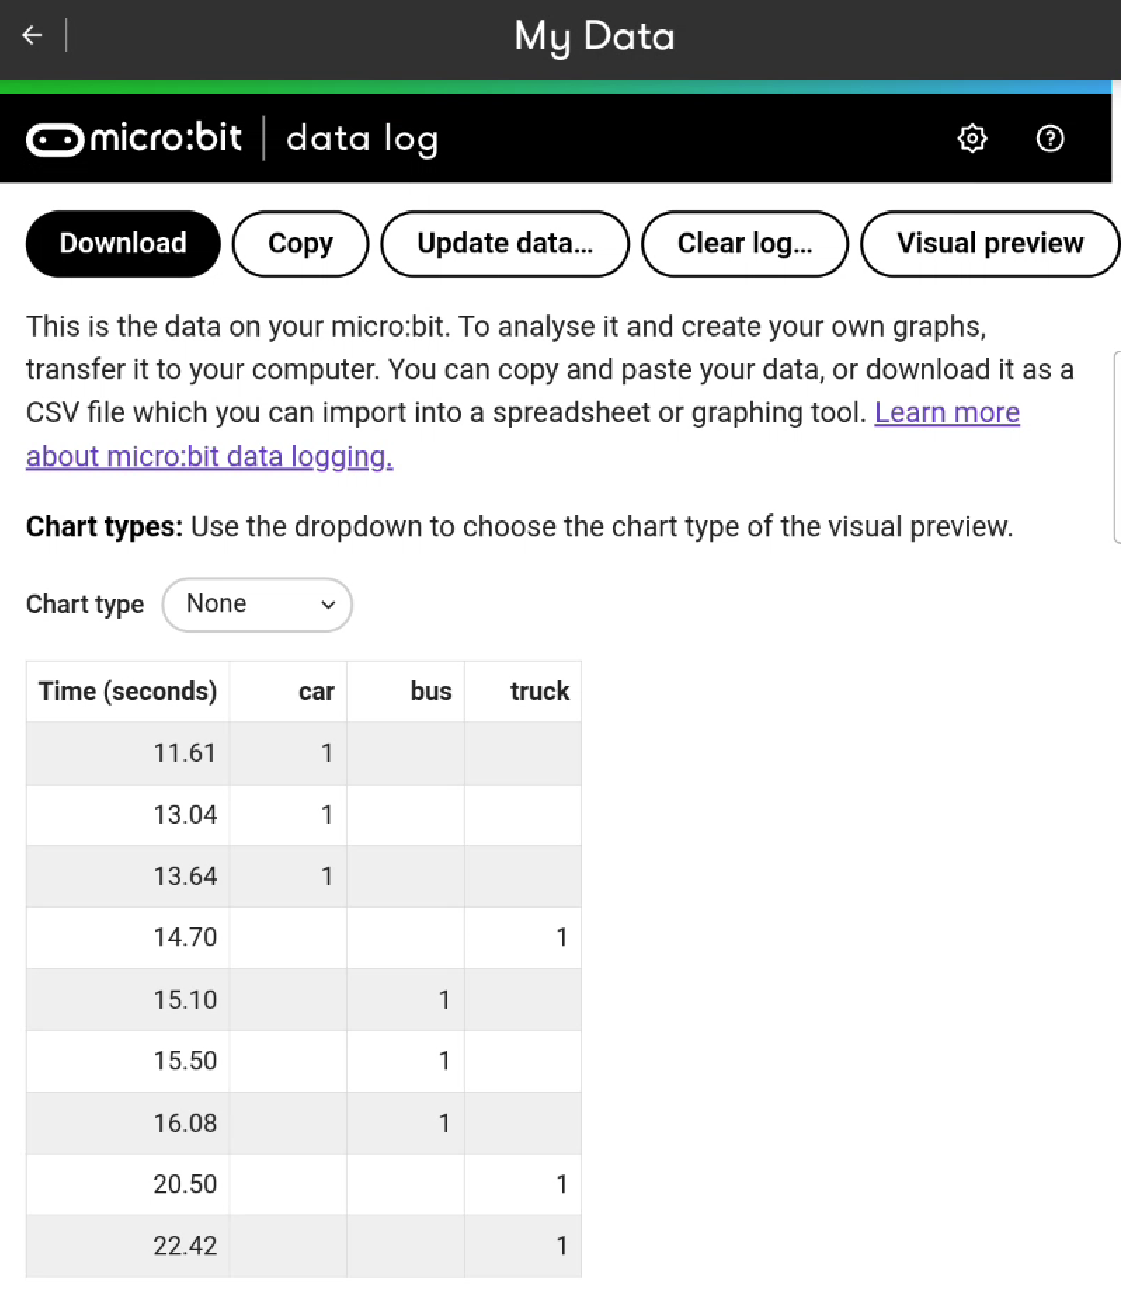
- Your data logging file will open. Here is an example of what some data logging files might look like within the app:
Troubleshooting
Forget previous pairings
If you experience any issues with the app, the first thing you can try is to 'forget' the previous pairings on your android device. Each time the micro:bit is flashed via USB the pairing information is updated, which means the Android device becomes out of date and you have to start the pairing process again.
Direct flashing
Direct flashing is still in development and as such you may experience issues in using it. Here is some troubleshooting advice for using webUSB with the micro:bit and the editors.